A Step-by-Step Guide to Creating a Login Page in React Native.
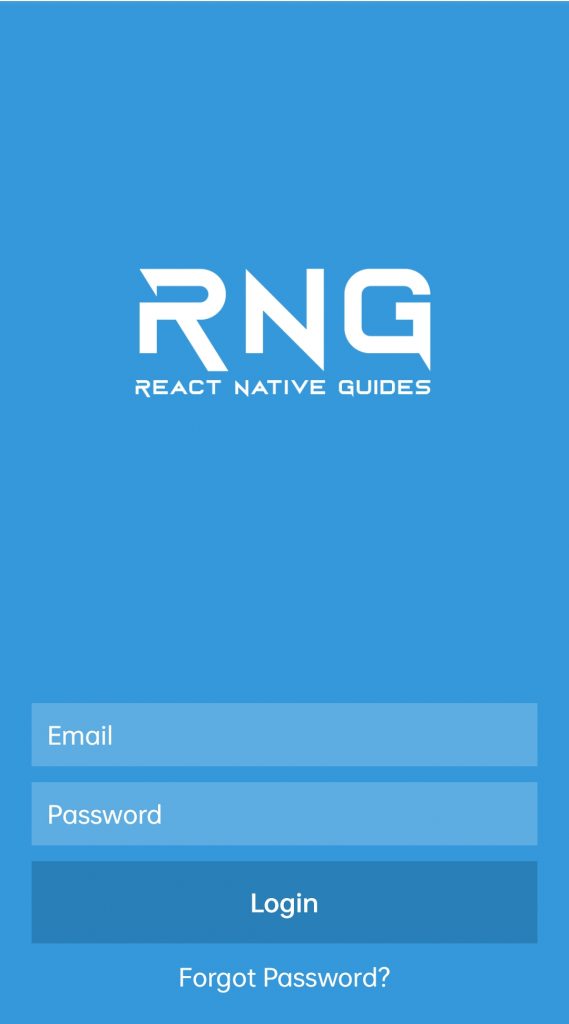
A login page is an essential component of mobile apps that require user authentication. It can help to improve security, personalize the user experience, track user activity, manage user data, and promote your app’s features and benefits. Here is how our page is going to look like at the end.

Creating a login page in React Native involves several steps. Here are some general steps that you can follow:
- First, create a new React Native project. You can do this by running the following command in your terminal:
npx react-native init MyLoginApp- Next, install any necessary dependencies. You may need to install packages like
react-navigationorreact-native-elements. - Create a new component for your login page. You can do this by creating a new file in your
srcdirectory, for exampleLoginScreen.js. - In the
LoginScreencomponent, you’ll need to define the state to hold the user’s email and password inputs. You can use theuseStatehook to do this:
LoginScreen example for React native
import React, { useState } from 'react';
import { View, Text, TextInput, TouchableOpacity, StyleSheet, Image, KeyboardAvoidingView } from 'react-native';

const LoginScreen = () => {
  const [email, setEmail] = useState('');
  const [password, setPassword] = useState('');

  return (
    <KeyboardAvoidingView style={styles.container} behavior="padding">
      <View style={styles.logoContainer}>
        <Image style={styles.logo} source={require('./assets/logo.png')} />
        {/* If you want to give title  */}
        {/* <Text style={styles.title}>Welcome to React Native Guides</Text> */}
      </View>
      <View style={styles.formContainer}>
        <TextInput
          placeholder="Email"
          placeholderTextColor="#ffffff"
          keyboardType="email-address"
          autoCapitalize="none"
          autoCorrect={false}
          style={styles.input}
          value={email}
          onChangeText={setEmail}
        />
        <TextInput
          placeholder="Password"
          placeholderTextColor="#ffffff"
          secureTextEntry
          style={styles.input}
          value={password}
          onChangeText={setPassword}
        />
        <TouchableOpacity style={styles.buttonContainer}>
          <Text style={styles.buttonText}>Login</Text>
        </TouchableOpacity>
        <TouchableOpacity style={styles.forgotPasswordContainer}>
          <Text style={styles.forgotPasswordText}>Forgot Password?</Text>
        </TouchableOpacity>
      </View>
    </KeyboardAvoidingView>
  );
};

const styles = StyleSheet.create({
  container: {
    flex: 1,
    backgroundColor: '#3498db'
  },
  logoContainer: {
    alignItems: 'center',
    flexGrow: 1,
    justifyContent: 'center'
  },
  logo: {
    width: 200,
    height: 200,
    resizeMode: 'contain'
  },
  title: {
    color: '#ffffff',
    marginTop: 10,
    width: 160,
    textAlign: 'center',
    opacity: 0.9
  },
  formContainer: {
    padding: 20
  },
  input: {
    height: 40,
    backgroundColor: 'rgba(255,255,255,0.2)',
    marginBottom: 10,
    color: '#ffffff',
    paddingHorizontal: 10
  },
  buttonContainer: {
    backgroundColor: '#2980b9',
    paddingVertical: 15
  },
  buttonText: {
    textAlign: 'center',
    color: '#ffffff',
    fontWeight: '700'
  },
  forgotPasswordContainer: {
    alignItems: 'center',
    marginTop: 10
  },
  forgotPasswordText: {
    color: '#ffffff'
  }
});

export default LoginScreen;
In this example, we’re using the TextInput component to render email and password input fields, and the Button component to render a login button.
- To navigate to the
LoginScreen, you’ll need to define a navigation stack. You can do this in yourApp.jsfile:
   import React from 'react';
   import { NavigationContainer } from '@react-navigation/native';
   import { createStackNavigator } from '@react-navigation/stack';
   import LoginScreen from './src/LoginScreen';

   const Stack = createStackNavigator();

   const App = () => {
     return (
       <NavigationContainer>
         <Stack.Navigator>
           <Stack.Screen name="Login" component={LoginScreen} />
         </Stack.Navigator>
       </NavigationContainer>
     );
   };

   export default App;
In this example, we’re using the createStackNavigator function to define a stack navigator. We’re adding a single screen to this navigator, which is the LoginScreen.
- Finally, you can add any additional functionality that you need to your login page, such as form validation or authentication.
This is just a basic example of how to create a login page in React Native. You’ll likely need to modify this code to fit your specific needs.
One Reply to “A Step-by-Step Guide to Creating a Login Page in React Native.”